
 Bahasa Indonesia
")
Creating a professional landing page is essential for businesses, marketers, and bloggers looking to convert visitors into customers or leads. While many believe they need premium tools to achieve this, Elementor Free provides everything you need to design an attractive and functional landing page—without spending a dime!
In this guide, we’ll walk you through the step-by-step process of creating a professional landing page using Elementor Free. Whether you’re a beginner or someone with design experience, this tutorial will help you get started quickly and effectively.
Creating a professional landing page using Elementor Free
Elementor Free is a popular drag-and-drop page builder plugin for WordPress. It allows users to create visually appealing web pages without any coding skills. While the Pro version unlocks advanced features, the free version still offers powerful tools like:
- A visual drag-and-drop editor
- Basic widgets (text, images, buttons, etc.)
- Responsive design capabilities
- A blank canvas for landing pages
With Elementor Free, you can build a high-quality landing page that attracts visitors and drives conversions.
Step 1: Install and Activate Elementor
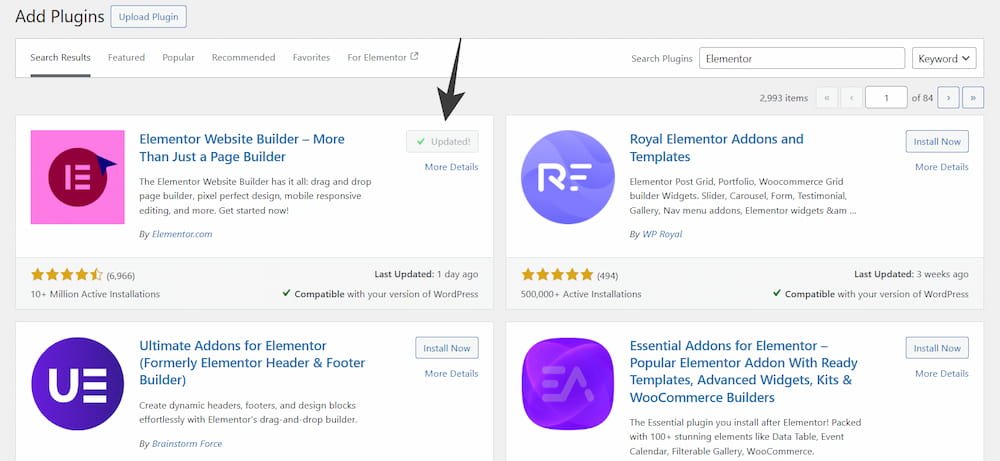
- Log in to your WordPress dashboard.
- Go to Plugins > Add New.
- In the search bar, type Elementor.
- Find “Elementor Website Builder” and click Install Now.
- After installation, click Activate.
Elementor is now ready to use!
Step 2: Create a New Page for Your Landing Page
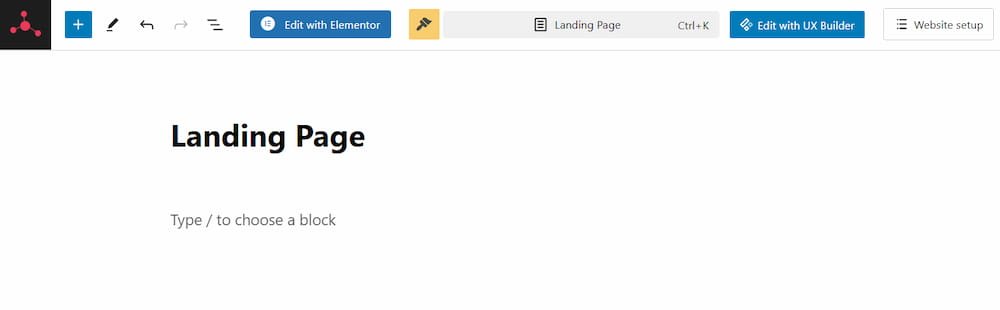
- Navigate to Pages > Add New in your WordPress dashboard.
- Give your page a title, such as “Landing Page”.
- Under Page Attributes, set the template to Elementor Full Width or Blank Page (to remove headers and footers).
- Click Edit with Elementor to launch the Elementor editor.
Now you’re in the Elementor interface where you can design your landing page.
Step 3: Set Up the Landing Page Layout
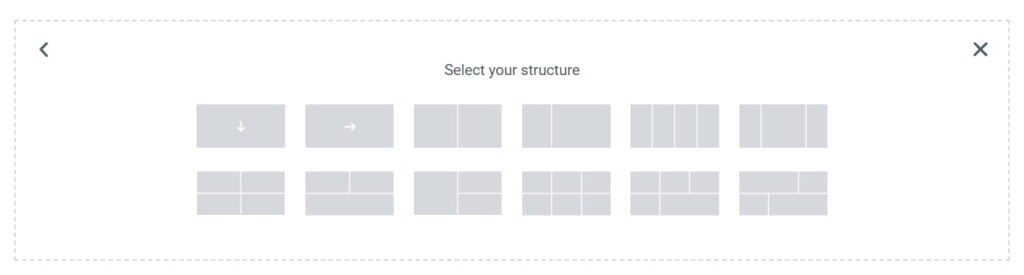
Once inside the Elementor editor:
- Choose a Layout:
- Click the “+” button to add a new section.
- Select a layout (single column, two columns, etc.) depending on your design goals.
- Set Section Properties:
- Click the section handle to open the Edit Section panel on the left.
- Adjust the Width (Full Width is ideal for landing pages) and Height to “Min Height” for better control.
- Customize Background:
- Under the Style tab, set a background color, gradient, or image.
- To use a high-quality image, upload one that aligns with your brand or theme.
Step 4: Add Essential Elements (Widgets)

Elementor Free comes with several widgets that are perfect for landing pages. Let’s add the essentials:
- Headline (Heading Widget):
- Drag the Heading widget into the section.
- Add a catchy headline that grabs attention (e.g., “Boost Your Business with Our Solutions!”).
- Use the Style tab to customize font size, color, and alignment.
- Subheadline (Text Editor Widget):
- Drag the Text Editor widget below the heading.
- Write a clear and persuasive subheadline to explain your offer.
- Call-to-Action Button (Button Widget):
- Drag the Button widget into the section.
- Customize the text (e.g., “Get Started” or “Sign Up Now”).
- Add a link to your form or another target page.
- Style the button (color, size, and hover effect) to make it stand out.
- Images or Videos (Image Widget):
- Drag the Image widget into a new section.
- Upload an image or video that complements your landing page goal (e.g., product demo, hero image).
- Testimonials or Social Proof:
- Drag the Image and Text Editor widgets to showcase testimonials.
- Write quotes or reviews from customers to build credibility.
- Contact Form (Using Shortcodes):
- If you’re using a contact form plugin like WPForms or Contact Form 7, paste the shortcode into a Shortcode Widget.
Step 5: Optimize for Mobile Devices
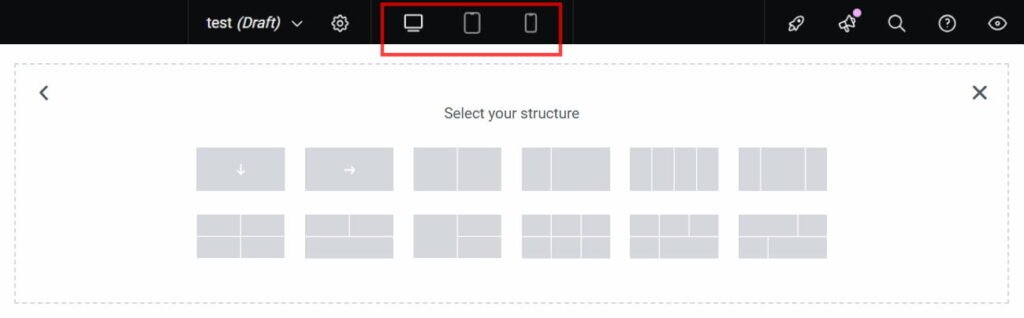
A landing page must look great on all devices. To ensure mobile responsiveness:
- At the bottom of the editor, click the Responsive Mode icon.
- Switch between Desktop, Tablet, and Mobile views.
- Adjust font sizes, margins, and padding for smaller screens.
- Preview the design to confirm everything looks perfect.
Step 6: Preview and Publish Your Landing Page
- Click the Eye Icon at the bottom to preview your landing page.
- Make any final adjustments.
- Once satisfied, click the Publish button.
Your professional landing page is now live!
Tips to Make Your Landing Page More Effective
To ensure your Elementor Free landing page performs well, keep these tips in mind:
- Focus on a Single Goal: Whether it’s lead generation or sales, have a clear call to action.
- Keep it Simple: Avoid clutter. Use clean layouts, clear text, and white space effectively.
- Use High-Quality Images: Visuals play a huge role in user engagement.
- Highlight Benefits: Focus on how your product/service solves the user’s problem.
- Add Social Proof: Include reviews, testimonials, or trust badges to build credibility.
Conclusion
Creating a professional landing page doesn’t require expensive tools or advanced coding skills. With Elementor Free, you can design stunning, functional landing pages that drive results. By following this step-by-step guide, you’ll have everything you need to create a landing page that converts visitors into leads or customers.
Also read: Elementor Pro 2025: Complete Guide and How to Get the Version
Ready to build your own landing page? Install Elementor Free today and start designing like a pro!
Download Elementor Pro 2025: Complete Guide and How to Get the Version
How to Create a Professional Landing Page with Elementor Free (Step-by-Step Guide)
5 Best Free Page Builder Plugins for 2025: Elementor Alternatives for WordPress